
Are you looking for a guide on how to make shirts with Cricut Maker? If yes, this is the blog for you! Jerry and I have been thinking about creating a personalized shirt for a long time. Finally, we did it! But what is so special about this project? Why did we choose to only make a personalized shirt? This is because our mother’s birthday is on the same date. Not surprising? Coincidentally, our mother’s birthday falls on the same day. Therefore, we decided to create something together for our moms.
Stay with me till the end, as I will make Cricut shirts for my mother. Follow all the steps I have provided in this blog carefully. This tutorial will be helpful for crafters who are looking for a shirt or just a guide that gives them an idea of making a shirt. I am sure you will find something that will help you create various similar projects in the future.
Step 1: Grab All the Tools and Supplies
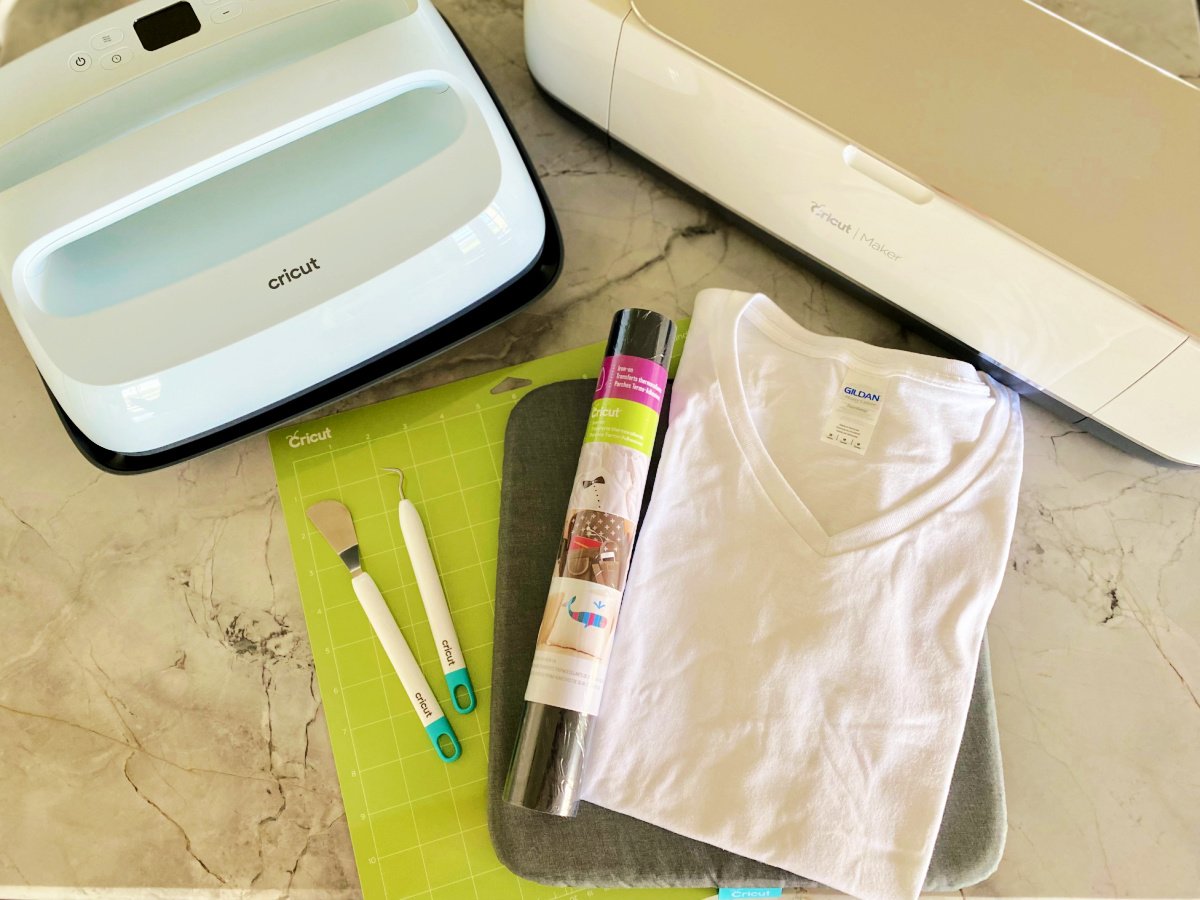
Before you learn how to make shirts with Cricut Maker, you need to gather the following supplies. Make sure you have all of them before moving to the next steps. Besides, you must have Design Space downloaded into your computer or mobile device.
Note: If you only have a machine, you should consider buying a Cricut Maker bundle, which gives you essential tools to meet your crafting needs.
- Cricut Cutting Machine
- Cricut Design Space
- StandardGrip Machine Mat
- Cricut Heat Guide or Cricut Heat app for Cricut EasyPress 3
- Fine Point or Premium Fine Point Blade
- Cricut Everyday Iron-On
- Weeder
- Cricut EasyPress 2 or 3
- Iron-On Protective Sheet (optional)
- T-Shirt Blank
Step 2: Create a Design in the Cricut App

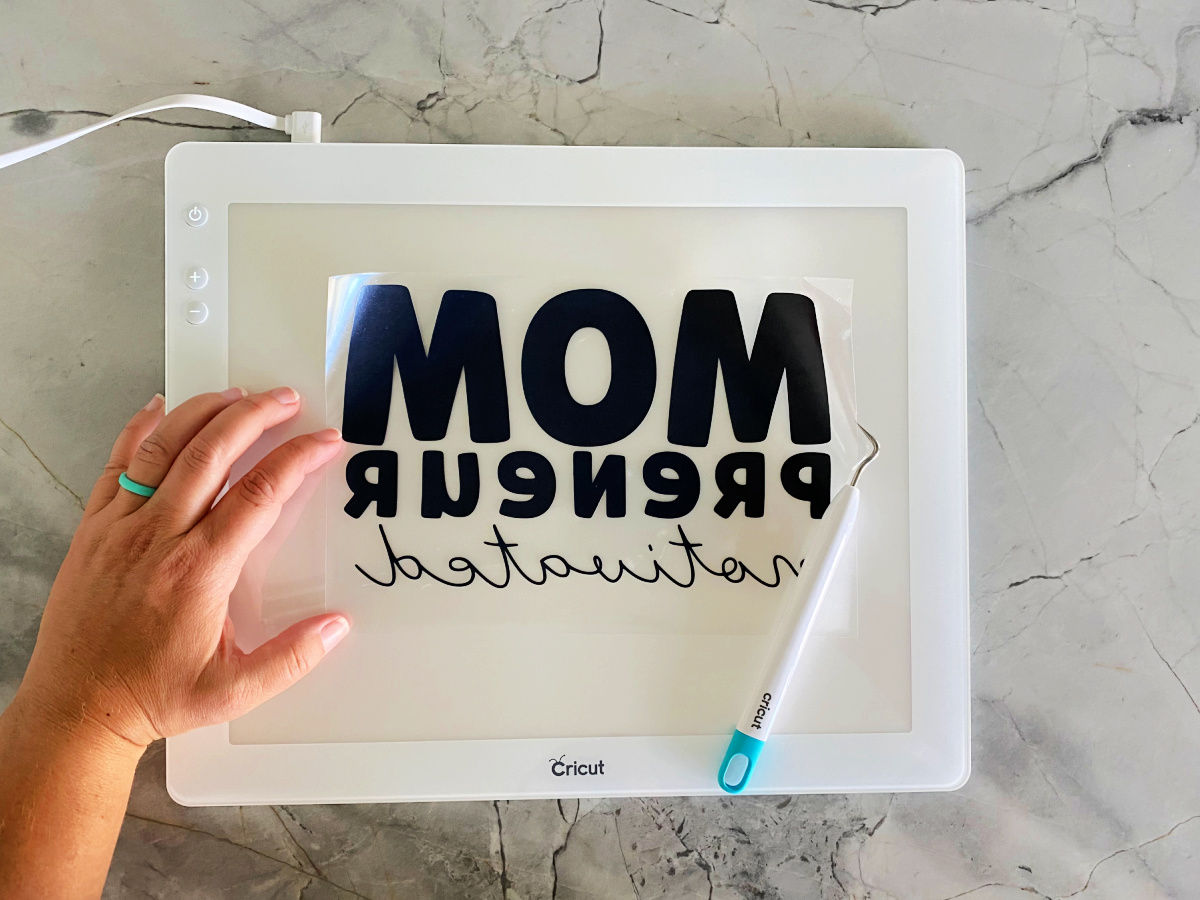
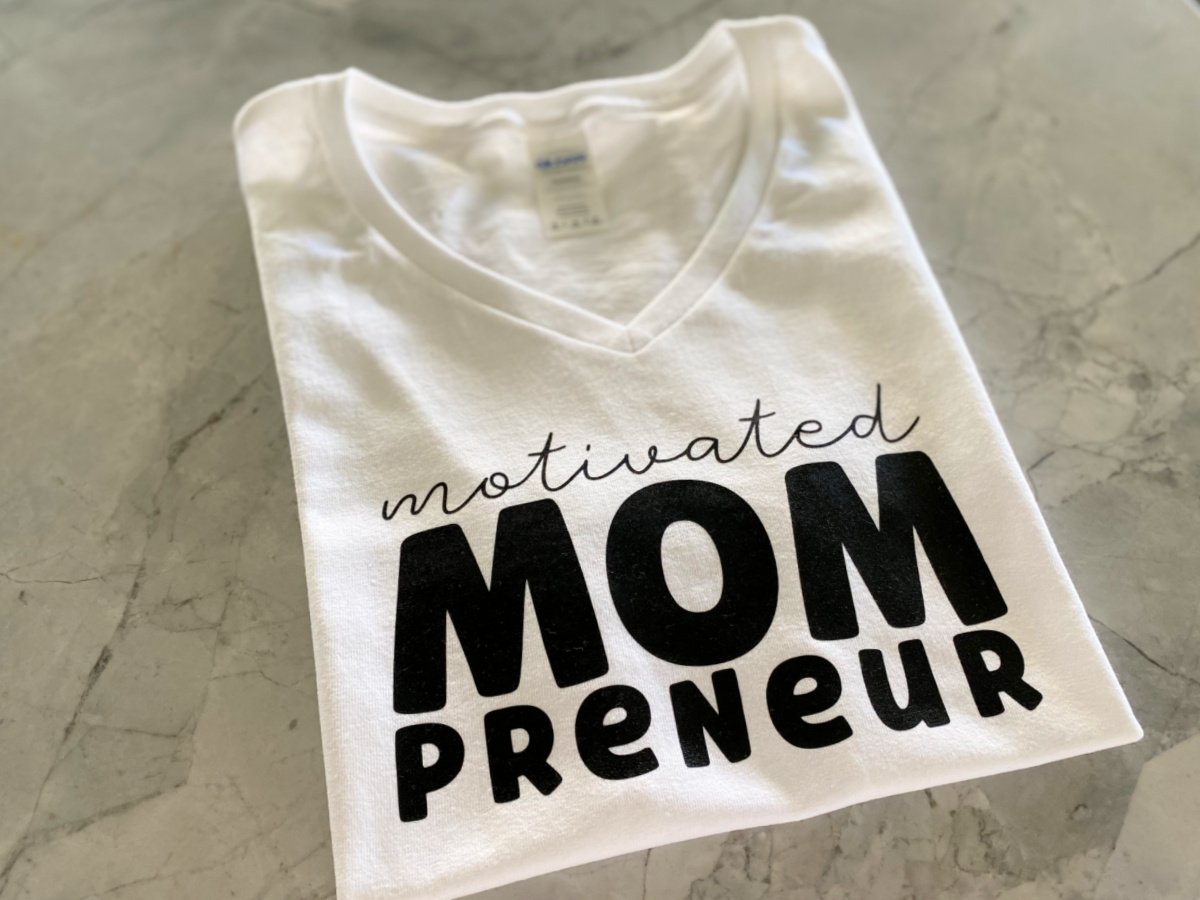
On Design Space, I made this for my mommy. She is a professional baker who runs her own bakery shop. So, I thought I would add such texts as ‘Motivated MOMPRENEUR.’ I simply moved to the Text tool given on the left toolbar to add the text. Then, I added the text and adjusted the fonts as per my requirements.
For the word—motivated, I chose a cursive font style and decided to keep the font style different for both MOM and PRENEUR. Similarly, you can express your own creativity to make it look unique!
Step 3: Mirror Your T-Shirt Design
In this step, we are going to mirror our design. This is very important if you don’t want inverted texts on your blank. For text, it is compulsory. Sorry😅, I forgot to tell you how to mirror your design. Here you go:
- Complete your Design on Design Space.
- Then, click on the Make It button in green color located at the upper right corner.
- After that, follow the instructions to proceed.
- Next, you will see the Mirror option on the left side.
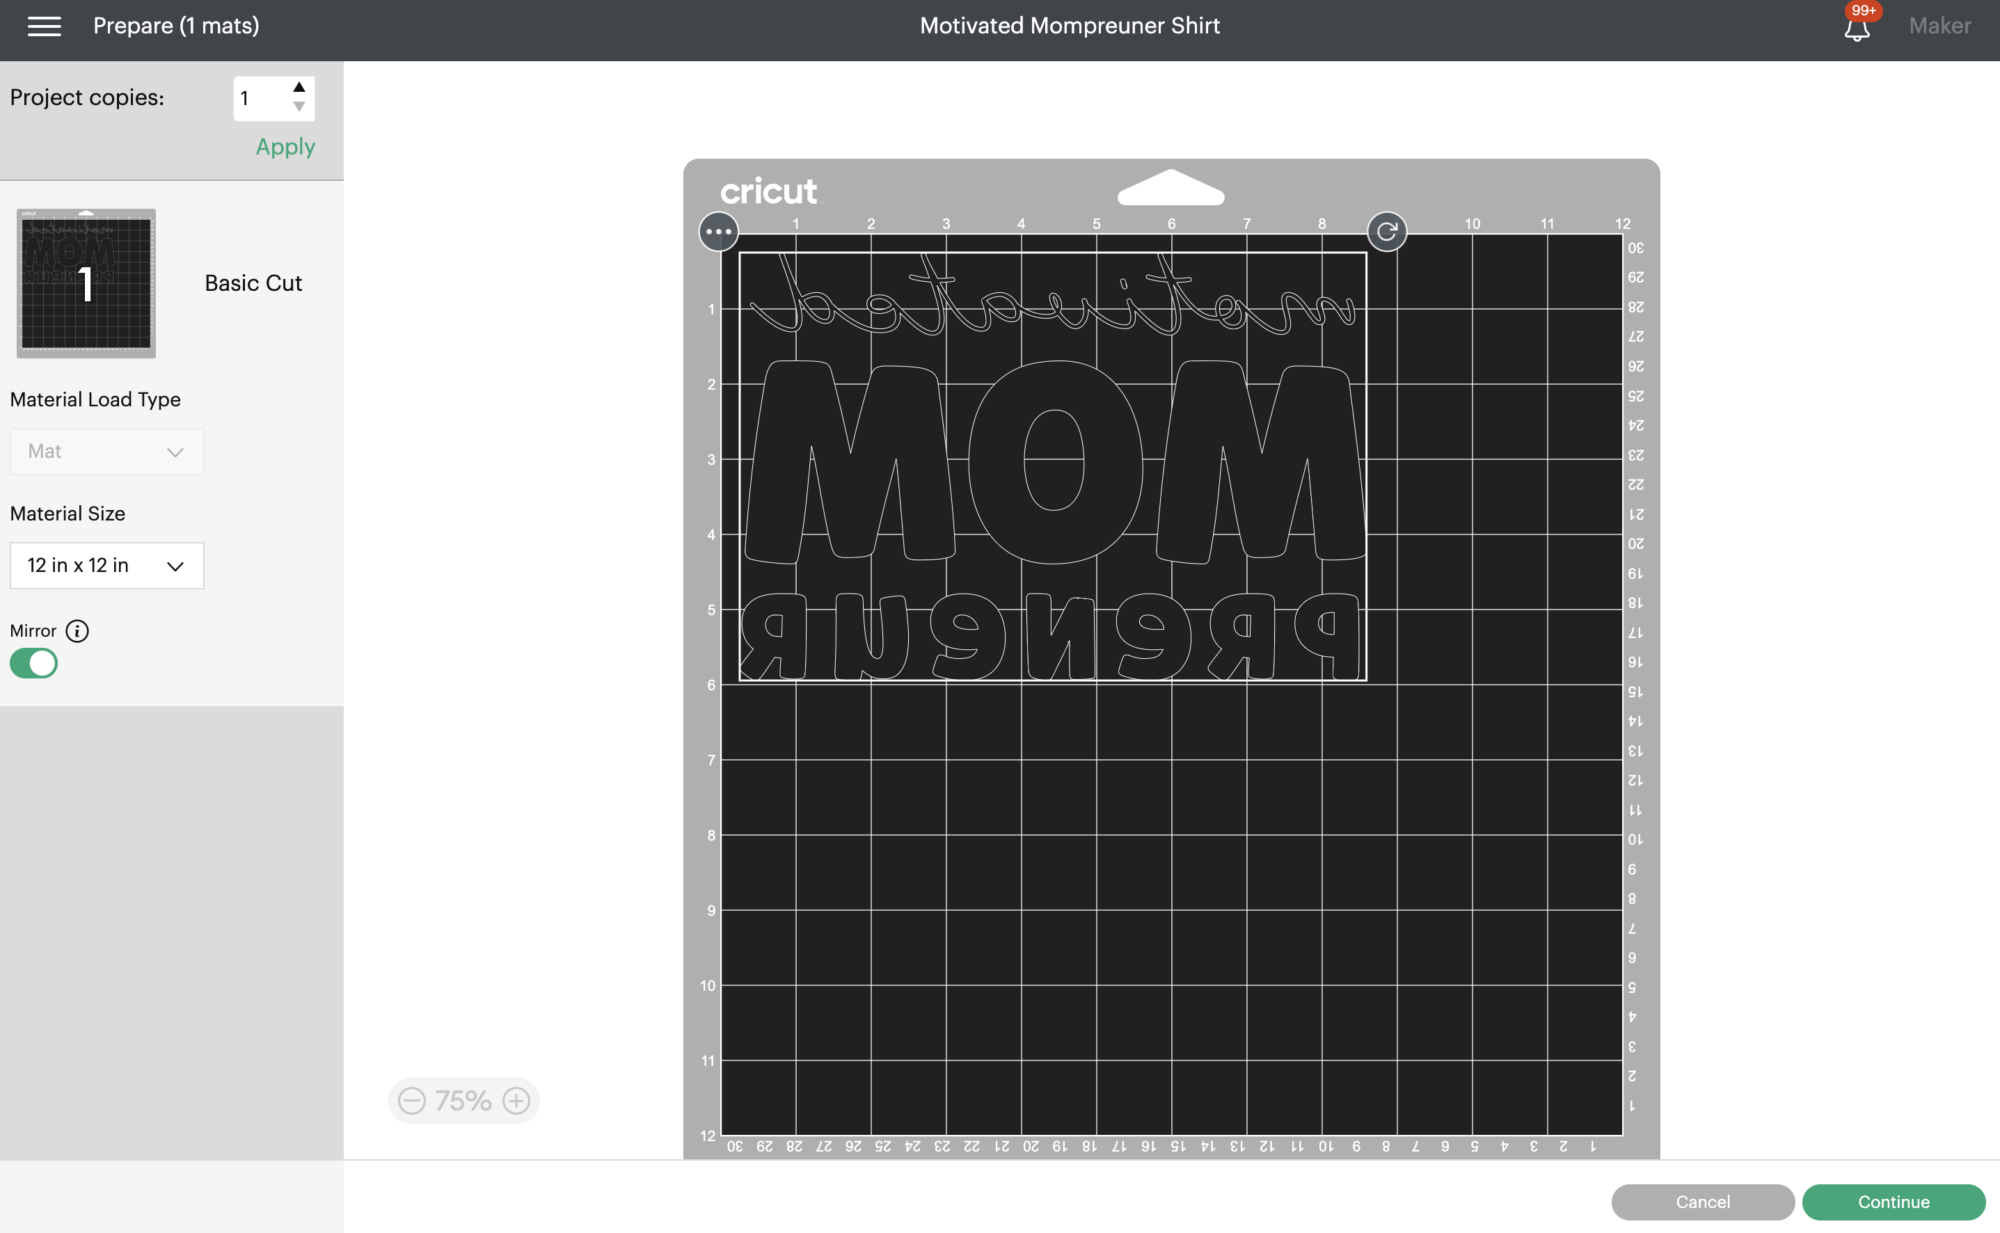
- Turn the togglebutton to turn on the mirror.
- Finally, press the Continue button to proceed.
Step 4: Set Your Material on Cricut Design Space
As you hit the Continue button, you see the screen in the picture below.
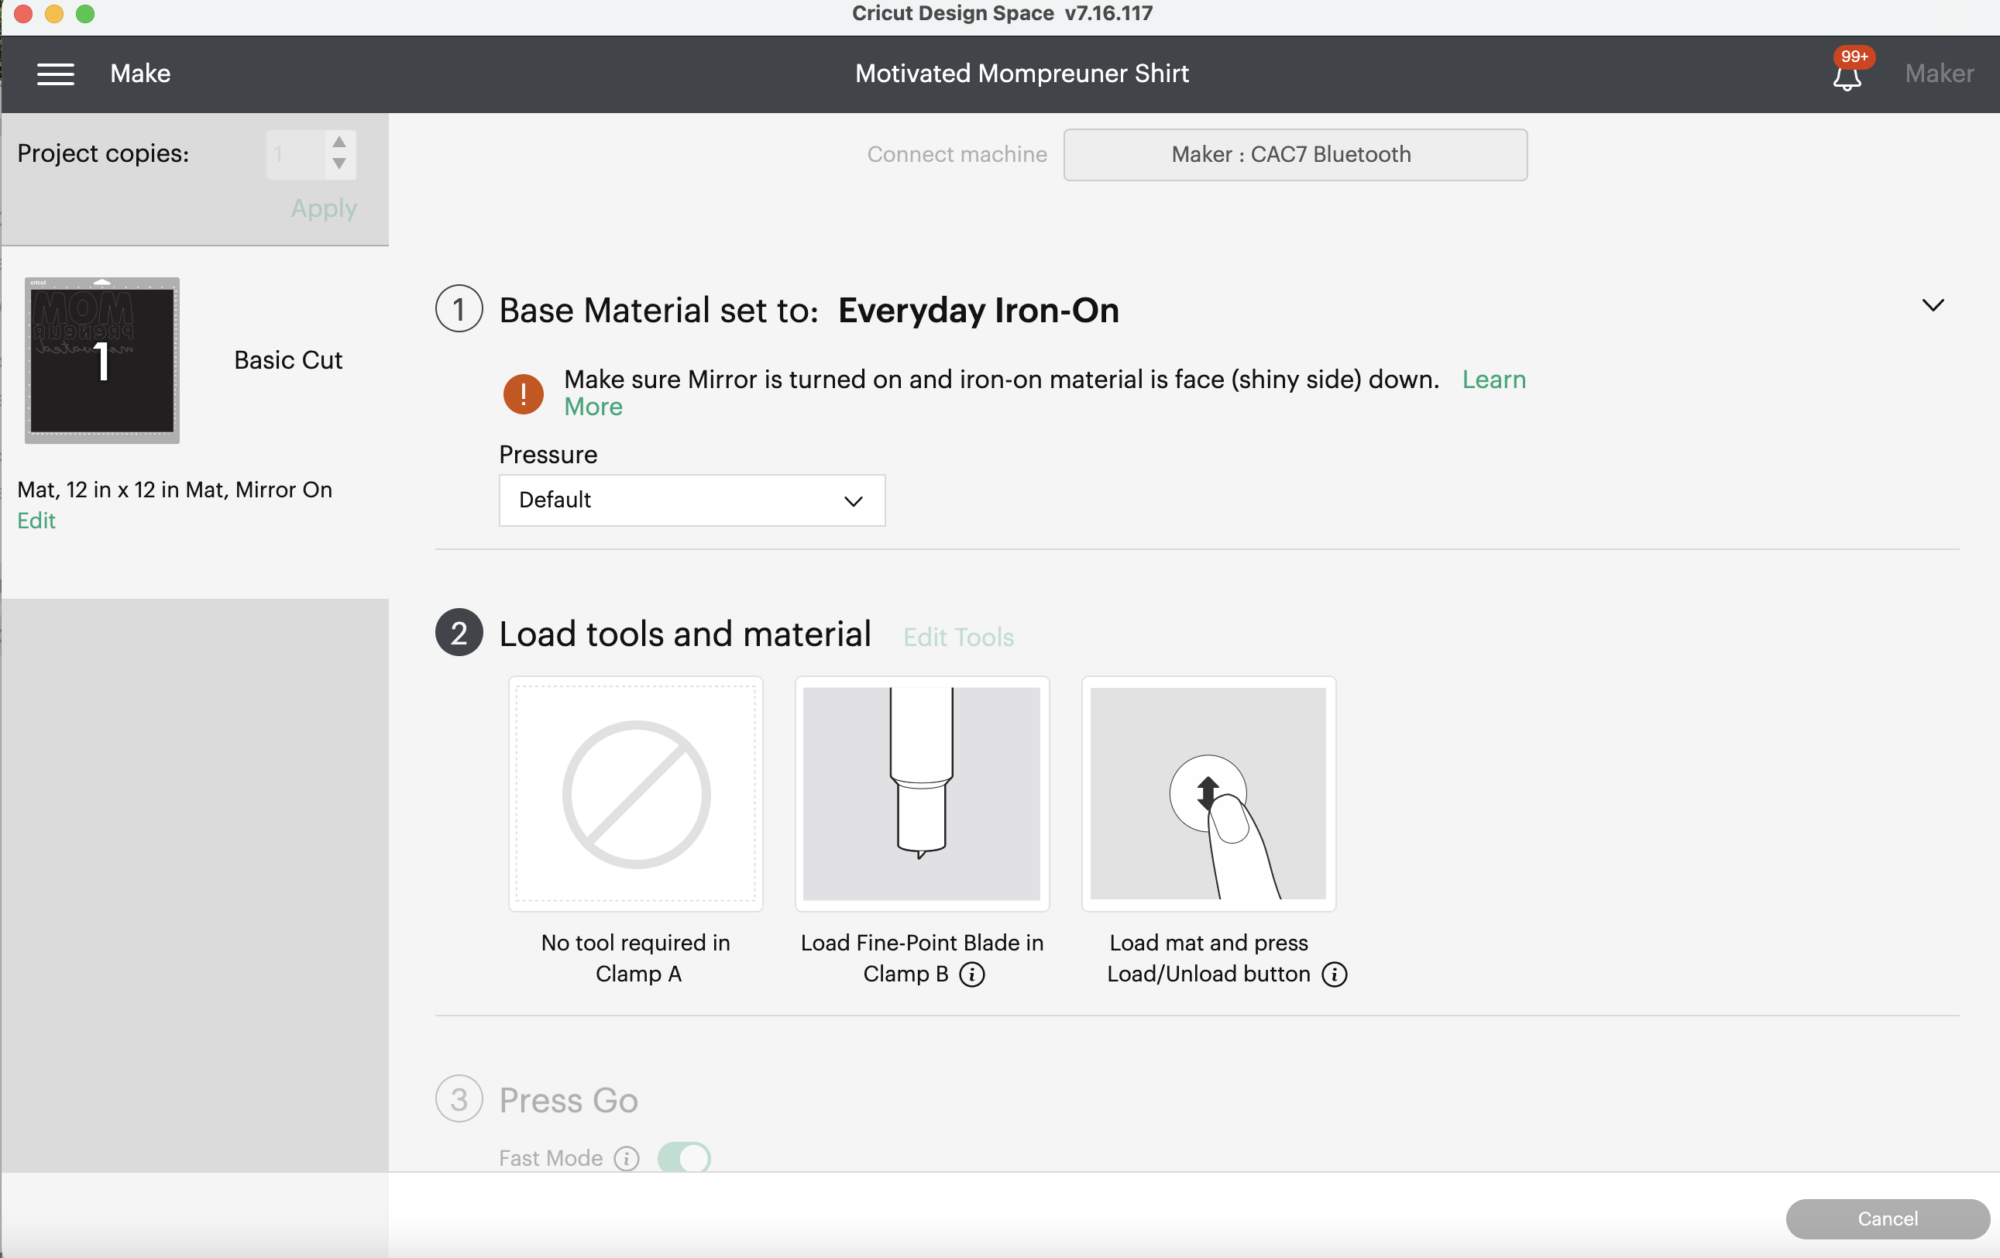
On this screen, you have to select your Everyday Iron-On from the list of materials. Note: For the Cricut Explore model, you will need to turn the Dial to Custom. After that, you have to use the drop-down on the screen to choose your desired material.
Step 5: Place the Iron-on Sheet on Your Mat
Okay, so now we are very close to the end of the tutorial on how to make shirts with Cricut Maker. In this fourth step, you are supposed to place the iron-on sheet on your Cricut cutting mat. Make sure the shiny is facing down towards your StandardGrip cutting mat.
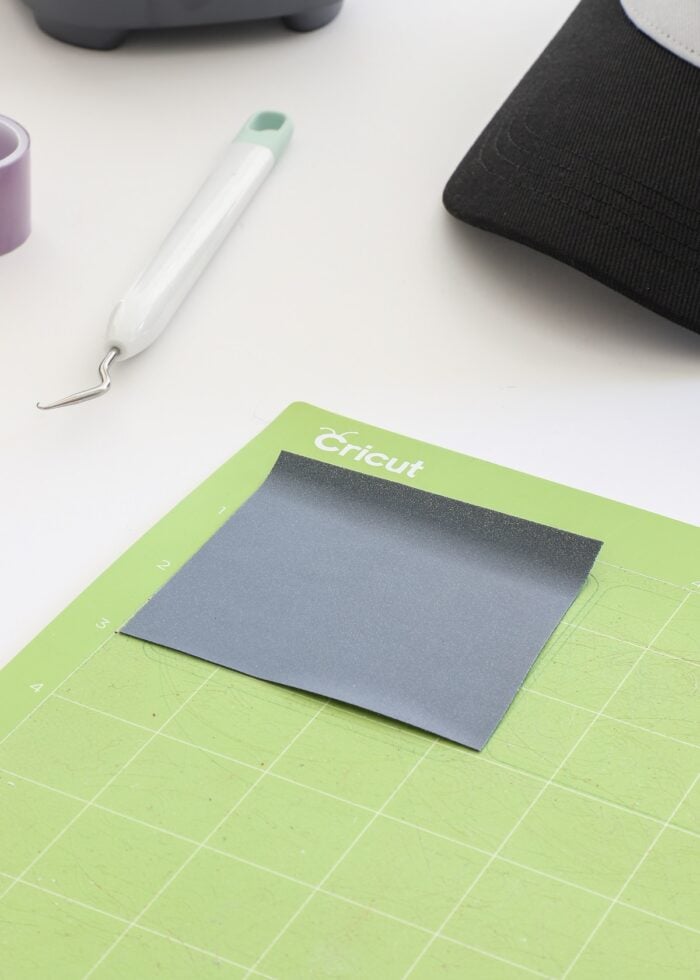
After that, you will need to move to cutting. Please refer to the next step.
Step 6: Load the Mat and Start Cutting
Now, you need to load your mat into the Cricut Maker machine. After loading the mat, wait until you see the light blink. Once it blinks, you will have to select Go and cut your design.
Once the design is cut, you can use BrightPad to weed the design. Also, use a weeding tool to remove the excess material.
Step 7: Apply Iron-On Vinyl on Shirt
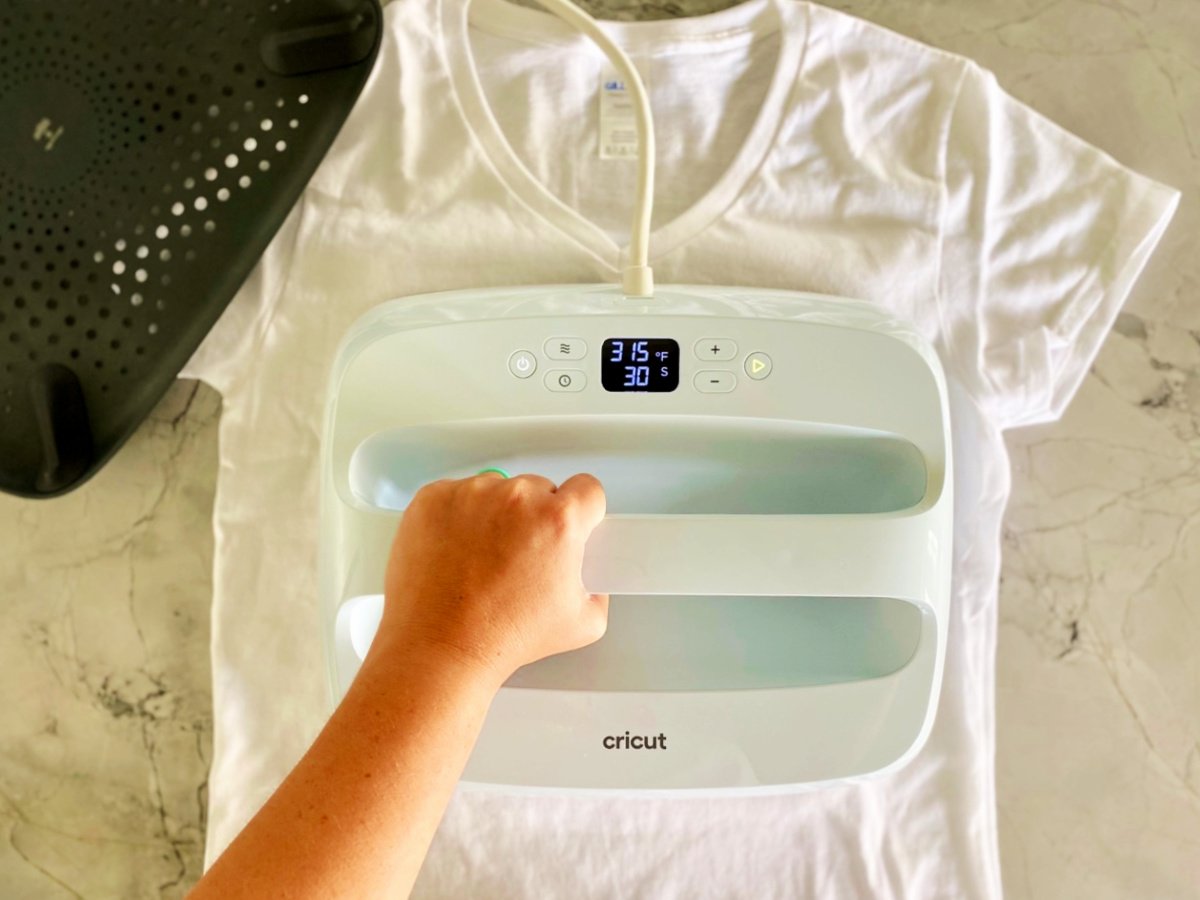
So, are you ready to learn how to make shirts with Cricut Maker and EasyPress? Make sure you have installed the Cricut Heat app for Cricut EasyPress 3. Then, you have to preheat your shirt at 315° F if you are using a 100% cotton shirt. Preheat the shirt for at least 5 seconds. Next, place the cut design on the shirt. Now, press the EasyPress 3 at 315° F for 30 seconds.
Lastly, flip the shirt over and apply the heat again to the back of your design. For this, you need to follow the instructions given in the heat guide. So, here’s the final one! 😍I am sure my mom would love it!
With this easy-to-follow tutorial on how to make shirts with Cricut Maker, you will be able to create similar projects quickly.
FAQs
Question 1: Is it worth buying a Cricut to make shirts?
Answer: Yes, there is no doubt about that. With Cricut, you can easily create your shirt, and that too in different colors. The Maker machine is robust, and hence, your investment will be really fruitful. It will cut every inch of your design precisely so that it will leave a long-lasting good impression. For shirts, I always rely on my trust in Cricut Maker. So do you.
Question 2: What tools and supplies do I need to make shirts on Cricut Maker?
Answer: Various tools or materials are available that you can use to create an excellent design for your shirts. Below is the list of essential supplies you must have before making a shirt on Cricut Maker. Here are the supplies you need for shirts:
- Cricut Maker machine
- Smart Iron-On (in different colors)
- T-shirt
- Material Trimmer
- Weeding Tool
- EasyPress Mat
Question 3: What types of iron-on vinyl should I use to create a shirt?
Answer: Below are the different types of Cricut iron-on that you can try for your shirts:
- Everyday Iron-On: It gives a classy finish in a single solid color, compatible with all Cricut models. It can be used with a StandardGrip mat.
- Textured Iron-On: This is the best to make a super cool shirt. Holographic iron-on and glitter are other examples of this type.
- Smart Iron-On: This is a kind of combination of regular and specialty iron-on.